 
Over 698,000 strictly plumbing related posts
Plumbing education, information, advice, help and suggestions are provided by some of the most experienced plumbers who wish to "give back" to society. Since 1996 we have been the best online (strictly) PLUMBING advice site. If you have questions about plumbing, toilets, sinks, faucets, drains, sewers, water filters, venting, water heating, showers, pumps, and other strictly PLUMBING related issues then you've come to the right place. Please refrain from asking or discussing legal questions, or pricing, or where to purchase products, or any business issues, or for contractor referrals, or any other questions or issues not specifically related to plumbing. Keep all posts positive and absolutely no advertising. Our site is completely free, without ads or pop-ups and we don't tract you. We absolutely do not sell your personal information. We are made possible by: 
|
|
Author:
roundrightfarm (WV)
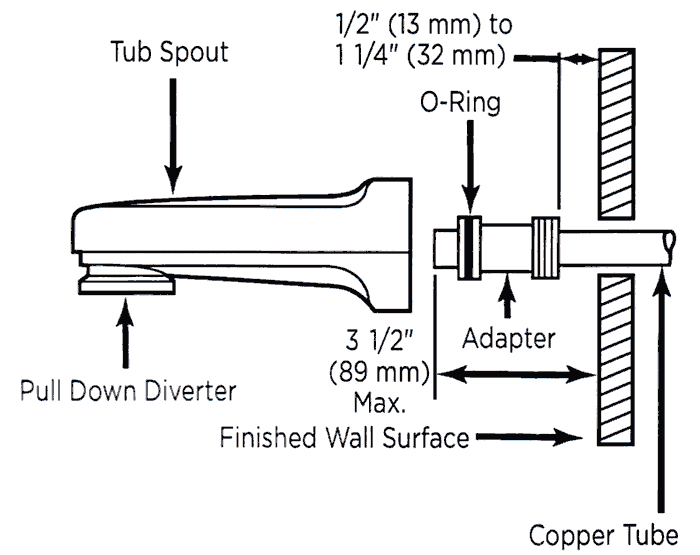
I'm having trouble wrapping my head around the best sequence of installation steps to make sure that the tub spout both fits tightly against the tile and forms a good seal with the pipe threads. It seems like there is little room for error here and that this is something inherently difficult to measure because it is hard to tell just where on the threads the spout will eventually tighten down.
I'm using copper piping and have access to both sides. I have a drop pipe soldered into the shower/tub valve, but I still need to solder in the elbow and horizontal pipe as well as attach the male adapter to the end to accept the spout. The tile is not in yet, but the cement backer is all in place.
What is the logical way to proceed from here?
|
|
Post Reply
|
|
|
Author:
bernabeu (SC)
[www.plumbingsupply.com]
+ appropriate length brass nipple
you will then have a SERVICEABLE connection
==============================================
"Measure Twice & Cut Once" - Retired U.A. Local 1 & 638
|
|
Post Reply
|
|
|
Author:
packy (MA)
a lot matters if you have a diverter spout or just a spout with no resistance
bernabeau's solution will work but the problem is that brass nipples come in 1/2 inch increments.
any time I try doing the spout that way it seems like I need a nipple 1/4 longer or shorter.
I stub out 1/2 inch copper, cut it close to the measure I need, slip on a male adapter (no soldered), put the spout in place and do some calculating to figure how far the spout is from the wall, add a strong 1/4 inch, cut the pipe and solder the adapter.
so there is no exact science but rather trial and error.
|
|
Post Reply
|
|
|
Author:
steve_g (CA)
That one thing that I've always liked about Delta tub spouts. They're very adjustable and forgiving.
|
|
Post Reply
|
|
|
Author:
steve (CA)
You can leave the copper stub long(as Packy stated, but I'd leave it longer) and solder the male adapter on after tiling is done. Install the spout and tighten to what to think is tight enough. Measure the gap between the spout and tile and also see if the adapter needs to be rotated. Unsolder the adapter and cut off from the pipe, the length of the gap. Resolder the adapter, rotated as needed. I also like the Delta spout/adapter.
|
|
Post Reply
|
|
|
Author:
roundrightfarm (WV)
Packy, if I understand you correctly, I believe I have the type of spout with no resistance. It is a Moen and when I pull up the pin, a circular piece of plastic is pulled up to block the water flow. With no water pressure behind it, the pin immediately falls back down when I let go.
I'm also thinking of ordering a Durock Shower System pipe seal to help seal the hole that I still need to make in the cbu. Do you think it will deform if I have to solder and perhaps resolder to get the male adapter just right, or will setting a wet cloth on it be fine? I should be soldering around 4" away from the plastic ring.
|
|
Post Reply
|
|
|
Author:
packy (MA)
if you have the spout that has a pin to pull up, it has resistance.
that means you will have to have a good solder joint and the male adapter threads will need some teflon tape and pipe dope (just as if it were a pressure pipe.
as for the hole. i usually just load it up with caulking after i solder the adapter. you can make it as messy as you want because it can't be seen after the spout is attached.
|
|
Post Reply
|
|
|
Author:
steve (CA)
Not a problem with 4" and a wet rag wrapped around the pipe.
|
|
Post Reply
|
|
|
Author:
sum (FL)
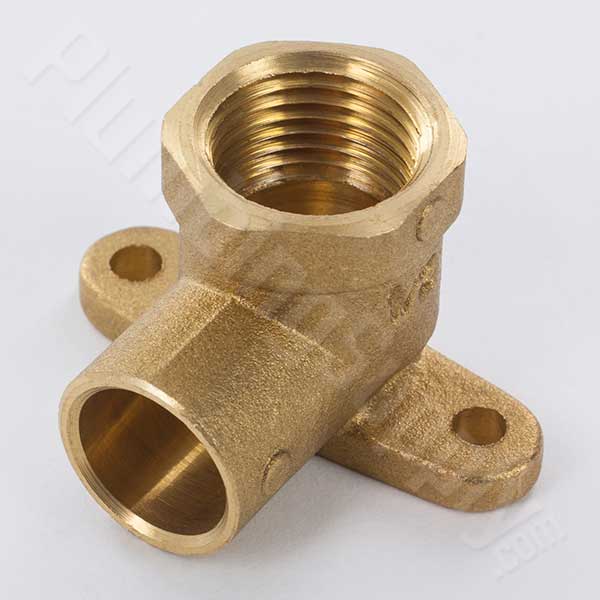
as others have suggested, as a DIYer, I typically do a drop ear 90 so I can secure that fitting to the framing.
Then I will take a piece of copper pipe, solder a male adapter to it, thread it into the drop ear 90 as tight as you can. Leave it sticking out of the wall and don't worry about cutting or soldering the other end yet.
Wait till water proofing membrane is in and tiles are installed, then get back to finish it.
I would then unthread the copper pipe, and thread the male adapter into the spout as tight as you can, then measure how deep it goes. From there you can calculate the amount of the male adapter that will be into each female fitting on both ends, and calculate the length of copper pipe needed. I usually add another 1/8" to 3/16" to it since I should be able to thread it tighter then hand tight, and also be mindful that sometimes when you feel it's tight enough, the spout is facing 3 'O' clock instead of 6, so you have to crack it even tighter.
If there is still a tiny sliver of gap between the spout and tile I don't worry too much about it. The important thing is you seal the hole on the finished wall around the pipe with silicone so water won't get behind the wall.
|
|
Post Reply
|
|
|
Author:
srloren (CA)
Actually, the best way to proceed with this job is to place a 1" longer than nipple than needed into a coupling and screw all onto a longer 1/2" pipe locked in a vice and cut the nipple to the correct size and thread it on your pipe machine. Better to cut it a hair short than a hair long, then it will fit properly against the tile or Fiberglass wall. Good luck.
|
|
Post Reply
|
|
|
Author:
bernabeu (SC)
srloren,
? you mean actually MEASURE and 'CUT' the required nipple ?
possibly using a 'nipple chuck' ?
oooooooh no, Mr. Bill, actual plumbing

==============================================
"Measure Twice & Cut Once" - Retired U.A. Local 1 & 638
|
|
Post Reply
|
|
|
Author:
sum (FL)
"Better to cut it a hair short than a hair long, then it will fit properly against the tile or Fiberglass wall."
This I do not understand. If you cut it a hair short, you might not get a water tight seal without over cranking to the point of cracking the tiles. I'd rather cut a hair too long and the worst is a tiny gap. Unless I am missing something.
|
|
Post Reply
|
|
|
Author:
bernabeu (SC)
little if any back pressure
the key is a 'hair' too short
it should get snug juuuust before it makes contact with 'wall'
==============================================
"Measure Twice & Cut Once" - Retired U.A. Local 1 & 638
|
|
Post Reply
|
|
|
Author:
sum (FL)
so when you make contact with wall the spout is point at 12 'O' clock. Now you have to do an additional 180 degrees? How would one make the calculation to take that into account?
|
|
Post Reply
|
|
|
Author:
srloren (CA)
Now you are asking the question that the answer is better too short...get it? Don't forget about using extra Teflon tape, oh and did I mention that there is no cap on the spout which means the pressure is only flow pressure, give er a thought or two, guys.
|
|
Post Reply
|
|
|
Author:
packy (MA)
sum, i carry a 1/2" AND A 3/4 " pipe tap in my tool kit.
sometimes chasing the female threads with a tap will clean them up a touch allowing for the extra 180 deg turn.
|
|
Post Reply
|
Please note:
- Inappropriate messages or blatant advertising will be deleted. We cannot be held responsible for bad or inadequate advice.
- Plbg.com has no control over external content that may be linked to from messages posted here. Please follow external links with caution.
- Plbg.com is strictly for the exchange of plumbing related advice and NOT to ask about pricing/costs, nor where to find a product (try Google), nor how to operate or promote a business, nor for ethics (law) and the like questions.
- Plbg.com is also not a place to ask radiant heating (try HeatingHelp.com), electrical or even general construction type questions. We are exclusively for plumbing questions.
Search for plumbing parts on our sponsor's site:
Special thanks to our sponsor:

|